Showing posts with label Birthday. Show all posts

Friday, May 6, 2011

Bring on the light


AKA: Happy birthday to me!

Have I mentioned that Moose is the best husband ever? If you need proof, I give you exhibit A:


He built me a light box!!! What a totally amazing birthday gift! Plus, it’s one that just keeps on giving… just think of all the wonderful embossed cards I’ll be able to make with it. Plus, it’ll be exceptionally useful whenever I need to trace something!

Moose built the light box mostly out of things we had on hand: scrap wood; electrical wiring; an electrical switch; some 13W CFL lightbulbs and a piece cut out of a broken fluorescent light diffuser. He only had to purchase the piece of glass and the light fixtures. He has promised me that he’ll write up a tutorial on how to make a light box of your very own for me to post on here soon.

Here’s a couple shots of the box turned on (it’s SUPER bright, so the pictures didn’t turn out very well):


And, finally, here’s a picture of the very first project I did with the light box (a Mother’s Day card I made for my amazing Mom):


Be sure to show your Mom just how much she means to you this Sunday! Have a fantastic week, everyone!

Friday, April 8, 2011

Happy Birthday, Carol!


Last week, my mother-in-law celebrated her birthday. Carol is a lovely person. She’s always excited about things and has such a zest for life – it’s pretty inspiring! She’s the one who always wants to find out what’s around the next bend or what’s over the next hill when we’re out walking. She’s incredibly crafty (crafting fairies, knitting, crocheting and felting are her specialties) and she has the most amazing garden with such beautiful plants and flowers.

And so, here is a bold, bright and sparkly flower card to celebrate the day of my mother-in-law’s birth.

Supplies:
·      Sheet of 8 1/2” x 11” bright green card stock
·      Sheet of 8 1/2” x 11” white text paper
·      Scraps of purple and pink glitter card stock (big enough to punch out two flower punch sets from each)

Equipment:
·      Computer
·      Printer
·      Paper trimmer
·      Bone folder
·      Multiple flower punch (see picture in step 5 for example)
·      Glue runner
·      Glue stick

Directions:
1.     Create a new letter-sized document in a design layout program (or Word) with 1/2” margins. Create a 3 1/4” x 4 1/2” text box in the upper left-hand corner and write in the text, “Happy Birthday” at the top of the box. Centre the text horizontally. Print the document on to the white text paper.


2.     Trim the white text paper with the paper trimmer to create a 3 3/4” x 5” panel. Cut the bright green card stock in half to create two pieces, measuring 5 1/2” x 8 1/2”. Set one aside for future use.

3.     Use the bone folder to fold the bright green card stock into a 4 1/4” x 5 1/2” card.

4.     Attach the white text paper with the “Happy Birthday” sentiment to the front panel of the card with the glue runner.


5.     Punch out two sets of flowers from each scrap of glitter card stock.


6.     Glue the flower pieces together, alternating the colours.


7.     Glue the finished flowers to the front panel of the card, alternating colours and flower design.


This week was my first week back working full-time (plus a three hour commute, round-trip). I have plans to keep posting, but please be patient with me if I, once in a blue moon, have to skip a week!

Have a wonderful weekend. See you next week!

Friday, April 1, 2011

Happy birthday, Dad!


Today is my Dad’s birthday. Word cannot express how wonderful he is. He’s always been there for me, whether it was helping a four-year-old me unlock the shed door so I could go and play with the Barbie house when my older sisters weren’t around, or walking me through my very first house purchase when I was 21. He’s bolstered my self-esteem when I was down, congratulated me on my achievements when I was on top of the world and walked me down the aisle when I married the man of my dreams.

My Dad is a farmer. He’s big, tall and strong – so much so that when I said my Dad could beat other dads up, I wasn’t lying (not that he would, but he certainly could!). He has farmer’s hands. You know the ones, big and always showing traces of grease, no matter what. As a kid, I used to watch him working in his shop, sometimes handing him tools (I still am terrible at remembering which tool is which, so I don’t know how helpful I really was) and observing him work his magic to get the farm equipment running again.

Recently, I borrowed some Paper Crafts magazines from our local library and came across a series of Father’s Day cards that used nails, washers and nuts. I thought that idea was brilliant and so perfect for my Dad, so I came up with this design for his birthday card.

Supplies:
·      Sheet of 8 1/2” x 11” light beige card stock
·      Strip of 3” x 5 1/2” patterned card stock in coordinating colours
·      Sheet of 8 1/2” x 11” white text paper
·      Four (or more, if you wish) washers (two large and two small – I used 7mm and 10mm)

Equipment:
·      Computer
·      Printer
·      Paper trimmer
·      Bone folder
·      Glue runner
·      Hot glue gun and glue stick

Directions:
1.     Open a new letter-sized document in a design layout program. Create a text box (about 2 1/2” wide) with the sentiment, “HAPPY BIRTHDAY” written in it. Print the document.


2.     Use the paper trimmer to cut the light beige card stock in half to get two pieces, each measuring 5 1/2” x 8 1/2”. Set one aside for future projects. Cut out the “HAPPY BIRTHDAY” sentiment, leaving a small border around the text.

3.     Fold the piece of light beige card stock in half to make a 4 1/4” x 5 1/2” card.

4.     Attach the “HAPPY BIRTHDAY” sentiment in the middle of the strip of patterned card stock with the glue runner. Glue the patterned card stock strip to the card, centering it vertically.


5.     Using the hot glue gun, carefully glue the washers on to the card in the pattern of your choice.


Enjoy your April Fools’ Day and the coming weekend, everyone. See you next week!

Friday, February 18, 2011

Happy Birthday, Ruth!


Today is Ruth’s birthday! Ruth is truly a wonderful human being – she is the type of person who senses when you are down and gives you a huge hug, she has an infectious laugh and she can make you feel happy just by being in her presence.

She’s up visiting us for a few days right now (we live over 10 hours away from each other by driving, so visits are highly anticipated and always over too soon), so I had to make her card, take pictures and write this post before she arrived on Wednesday. I, of course, left it to the last day, so here I sit typing away feverishly 45 minutes before I have to leave to go pick her up at the bus terminal. Luckily, I had already decided exactly what I wanted to do for her card, so after a last minute trip to Michael’s this morning for supplies, I was able to craft this pretty and glittery greeting for our dear friend.

Supplies:
·      Sheet of 8 1/2” x 11” black card stock
·      Sheet of 8 1/2” x 11” silver text weight paper
·      Two sheets of 8 1/2” x 11” white text weight paper (to catch glitter)

Equipment:
·      Computer
·      Printer
·      Paper trimmer
·      Bone folder
·      Glue stamp pad
·      Clear stamp mounting block
·      Clear acrylic stamp (I used a rose patterned one)
·      Hot pink glitter
·      Glue runner

Directions:
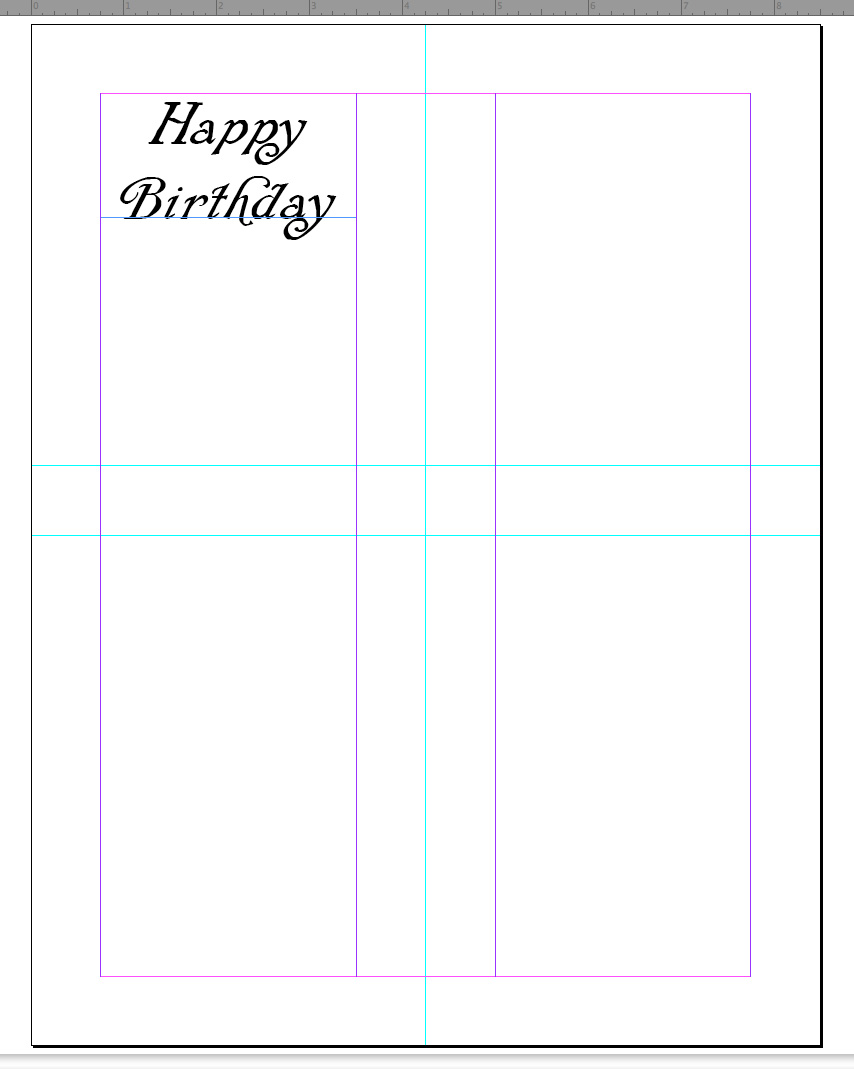
1.     Create a new 8 1/2” x 11” document in a design layout program. Make a text box in the upper left hand corner (approximately 3” wide) and write the words, “Happy Birthday” in the font of your choice. Print the document.

2.     Use the paper trimmer to cut the black card stock in half to get two pieces, measuring 5 1/2” x 8 1/2” each. Set one aside for future projects. Trim the silver text weight paper to create a small rectangle around the “Happy Birthday” text. Trim a 3 3/4” x 5” rectangle from the remaining silver paper and set the rest aside for future projects.

3.     Fold the black card stock into a 4 1/4” x 5 1/2” card with the bone folder.

4.     Use the glue runner to attach the 3 3/4” x 5” rectangle to the inside right panel of the card.


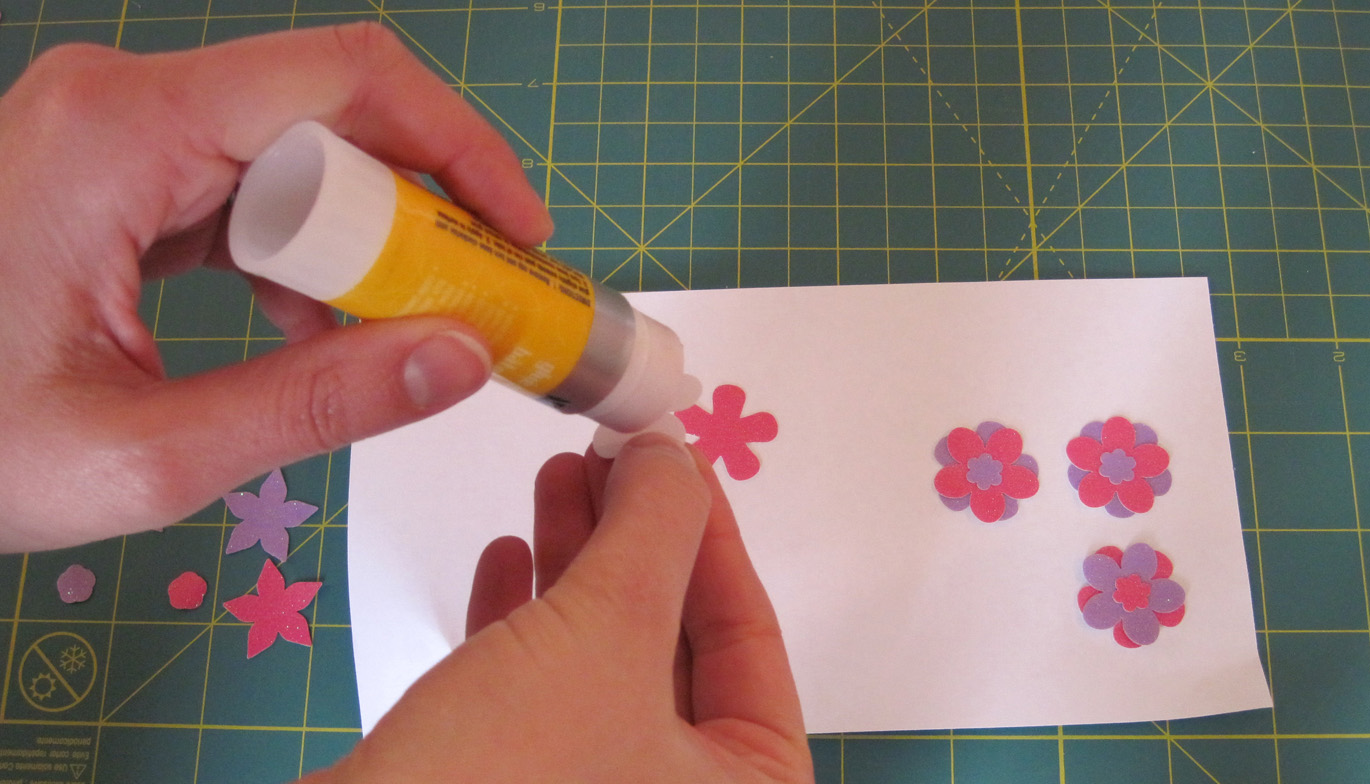
5.     Place the card on one of the sheets of white text paper. Mount your stamp on the stamp block. Tap the stamp on the glue pad to coat the stamping surface with glue. Stamp four roses on the front panel of the card, positioning them in the four corners (make sure to coat the stamp with glue between stamps).


6.     Pour glitter over the stamped images. Once completely covered, pick up the card and tap it on to the white paper to get rid of the excess glitter. Use a small paintbrush to brush any bits of glitter that remain on the card (that aren’t part of the stamped image, of course!).


7.     Wash the stamp and stamp block before the glue dries.

8.     Put the uncapped bottle of glitter on to the other sheet of white paper. Take the paper with the excess glitter on it and funnel it over the glitter bottle to return the excess glitter to its container.

9.     Use the glue runner to attach the “Happy Birthday” sentiment to the middle of the front panel of the card.


Have a wonderful weekend , everyone (or long weekend, if you are in Ontario or anywhere else that has a very much needed long weekend this week!). See you next Friday!

Thursday, January 27, 2011

Happy (belated) birthday, Matt!


Since I am heading off to Indiana with Moose at the ungodly hour of 3:00 a.m. tomorrow morning in order to visit our dear friends Caela (of Heinous Hats), Rufus and Matt for the weekend, tomorrow’s post shall now be today’s post.

This past Sunday, one of my best guy friends, Matt (a different one from the one we’re visiting this weekend), celebrated his 30th birthday. Since he recently moved with his lovely wife (and another of my best friends), Virginia, to Newfoundland, we do not get to party with him this year, at least not until the next time we all get together. It really drives home how hard it is not to have them around anymore and how much I miss them.

To stave off this depressing thought, it only seemed right to make him a card that was a silly and cheerful, with a slightly geeky theme to honour his interests on this momentous occasion.

Enter the robot birthday card. Here’s hoping he’s already got it, since I was a little late getting it in the mail (and the postal service seems to be exceptionally slow between here and the Island to boot!).

Supplies:
·      Sheet of 8 1/2” x 11” blue card stock
·      Sheet of 8 1/2” x 11” silver text weight paper
·      Scrap of polka dot patterned card stock


Equipment:
·      Computer
·      Printer
·      Paper trimmer
·      Bone folder
·      Craft knife
·      Scissors
·      Metal-edged ruler
·      Pencil
·      Thin-tipped black marker
·      Glue stick
·      Piece of wax paper and a heavy book for pressing

Directions:
1.     Create a new letter-sized (8 1/2” x 11”) document in a graphic design program. On the left side of the document, create a 3 1/4” x 4 1/2” box using guidelines. Create a text box within these guidelines (about 1/3 of the way down) with the words, “happy birthday”. Insert a robot image (I used this one) in the bottom right corner. Insert the same image on the right side of the document. Resize it so that it is approximately 5” tall. Print the document on the silver text weight paper. Allow time for the ink to dry.


2.     Cut the right side of the silver text weight paper (around the “happy birthday sentiment”) with the paper trimmer to make a 3 3/4” x 5” panel. Cut the blue card stock in half to get two 5 1/2" x 8 1/2" pieces. Set one aside for future projects and fold the other with the bone folder to make a 4 1/4" x 5 1/2" card.

3.     Use the craft knife, scissors and metal-edged ruler to cut out the robot image.


4.     Draw a party hat (rectangle) on to the scrap of polka dot card stock. Size the hat so that it is proportionate to the robot’s head. Use the black marker to outline the hat shape (to mimic the outlines on the robot). Cut out the hat, just outside the black marker border.


5.     Use the glue stick to glue the “happy birthday” panel to the inside right side of the card. Glue the robot and the party hat to the front of the card.


6.     Place the piece of wax paper on top of the closed card and press the card with the heavy book until the glue is dry.

That’s all for today, Internets! Hope you have a fantastic weekend and a wonderful start to February. Come back next Friday for the next card in the Valentine’s Day series.

Friday, January 14, 2011

Happy Birthday, Cait!


Today is my friend, Cait’s, birthday. We met in university while living in the same residence, Arts House, where we got up to many crazy adventures. Cait and I share many interests, but the first one that comes to mind is loving cats. Naturally, a cat-themed card came to mind first thing when creating a card for her birthday.

This is another hand cut card. I used a metal-edged ruler to guide my knife for all of the straight cuts, but did the rest freehand.

Supplies:
·      Sheet of 8 1/2” x 11” red card stock
·      Sheet of 8 1/2” x 11” white text paper

Equipment:
·      Computer
·      Printer
·      Paper trimmer
·      Bone folder
·      Craft knife
·      Metal-edged ruler
·      Cutting mat
·      Black marker
·      Glue stick
·      Glue runner
·      Piece of wax paper
·      Heavy book

Directions:
1.     In a design program, create the kitty on the windowsill image, making the window outline 3 3/4” wide x 5” tall. I used this cat silhouette for the kitty and drew a box to create the window, drawing intersecting lines to create the windowpanes. On the same document, create a 2 3/4” wide text box and type in the words, “Happy Birthday!”, using the font of your choice. Position the text box so that there’s enough room around it to create a 3 1/4” x 4 1/2” rectangle. Print the page and allow time for the ink to dry.


2.     Cut the red card stock in half with the paper trimmer, creating two pieces measuring 5 1/2” x 8 1/2”. Set one aside for future projects.

3.     Fold the red card stock with the bone folder to make a 4 1/4” x 5 1/2” card.

4.     Cut the printed white paper so that the cat image and the text are separated. Trim a 3 1/4” by 4 1/2” rectangle around the “Happy Birthday” text to create an inside panel for the card. Trim the cat image so there is a small border around the window image.

5.     Use the glue runner to attach the “Happy Birthday” text panel to the inside right panel of the card.


6.     Use the knife and ruler to carefully cut out the kitty on the windowsill image.


7.     If there are any unprinted (white) areas left on the cut out image, use the black marker to touch them up.


8.     Wash your hands. Trust me, you’ll be covered in black ink, no matter how long you let the printed image dry (I left mine overnight and I still had smudgy fingers) and you don’t want to accidentally smear black ink from your fingers on to your card.

9.     Place the cut out image face down on a scrap piece of white paper. Spread glue on to the cut out with the glue stick. Carefully lift up the cut out image and glue it to the centre of the card’s front panel.


10. Lay the wax paper over the closed card (face up). Put the book over the wax paper and press until the glue is dry (to prevent the cut out from curling or peeling).

Have a wonderful weekend! See you on Monday for the start of a series of creative and beautiful Valentine’s Day cards.

P.S. Velvetkitten, over at In the Kitchen with Kitten promoted Card Tricks in her post last Wednesday! Check it out here.

Monday, December 27, 2010

Happy Birthday, Wesley!


 Today is a very special day for a very special nephew – it’s Wesley’s 7th birthday! To honour this special occasion, I made him a birthday card, featuring a little skating penguin (Wesley’s quite the skater) with a message for the birthday boy.

Supplies:
·      Sheet of 8 1/2” x 11” dark blue card stock
·      Sheet of 8 1/2 x 11” white text weight paper

Equipment:
·      Paper trimmer
·      Bone folder
·      Glue stick
·      Glue runner
·      Snowflake punch
·      Skating penguin stamp
·      Black ink stamp pad
·      Markers and/or pencil crayons
·      Blue glitter glue
·      Paint brush
·      Wax paper
·      Black felt pen

Directions:
1.     Use the paper trimmer to cut the dark blue card stock in half to get two pieces measuring 5 1/2” x 8 1/2” each. Trim the white text weight paper into two 3 3/4” x 5” pieces. Save the rest to use as scraps.

2.     Punch four snowflakes from one piece of the dark blue card stock. Save the rest of that piece for future projects.

3.     Spread the glitter glue on to the snowflakes using the paint brush (technique here - steps six and seven). Set the snowflakes aside until dry.

4.     Saturate the stamp with ink from the pad. If desired, do a few test stamps on the scrap white paper. Stamp the penguin on to one of the 3 3/4” x 5” pieces of white paper (centered near the bottom of the paper). Let the ink dry.


5.     Fold the other piece of dark blue card stock into a 4 1/4” x 5 1/2” card (technique here) using the bone folder.

6.     Colour in the dried stamp with the markers and/or pencil crayons.


7.     Write outside sentiment above the stamped penguin. Write the concluding sentiment on the other piece of 3 3/4” x 5” paper.


8.     Glue three of the snowflakes around the penguin. Adhere the last snowflake on to the other piece of white paper.


9.     Use the glue runner to attach the penguin stamped piece of paper to the front of the card and the concluding sentiment piece of paper to the inside right panel of the card.

This was my first attempt at stamping. It took me a few tries and I found I had to enhance the black ink on the penguin. I’m interested, however, in learning more stamping techniques and improving on the limited stamping knowledge I have so far. Can any of you give me any tips, advice, techniques, etc.? Drop me a line here and I’ll feature your input in an upcoming post!

See you on Wednesday, everyone!